Note: This is for Trade-Ideas Pro version 3 and later. Here are the instructions for previous versions.
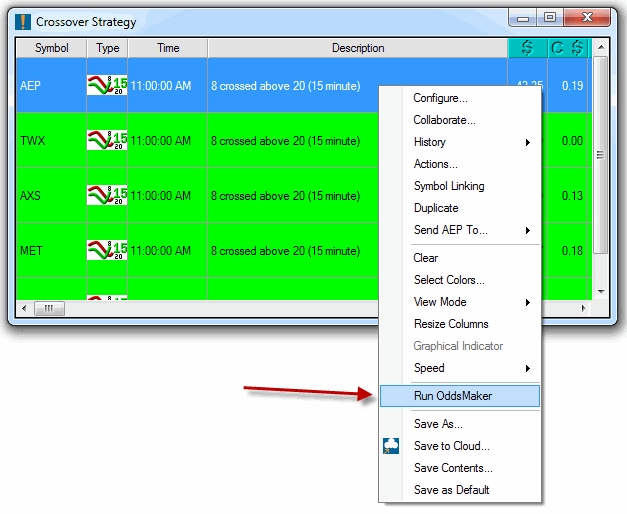
The OddsMaker is located on the right-click menu in an alert window. Choose the Run OddsMaker menu item to bring up the OddsMaker.
The Configure OddsMaker screen appears.
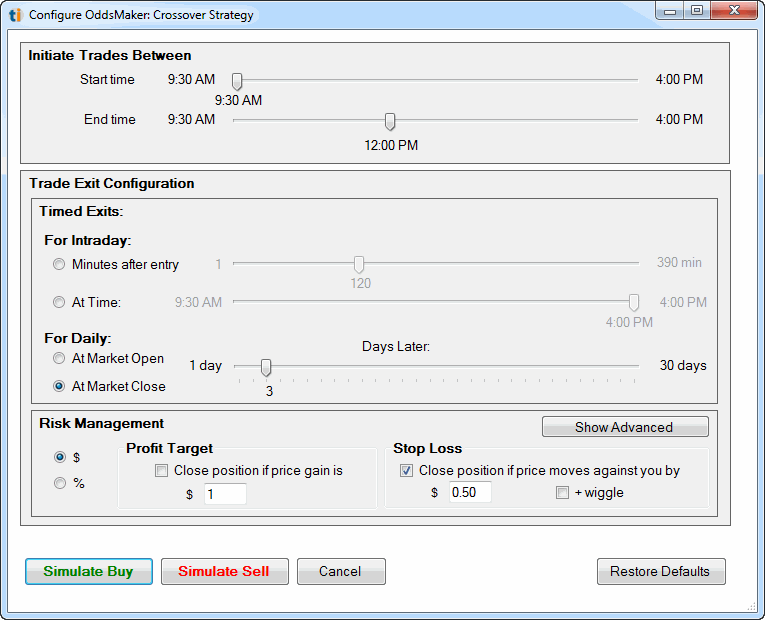
Click Simulate Buy or Simulate Sell to run the OddsMaker. As it's running the following window will appear and show progress. The green portion of the progress bar indicates how many trades so far have been winners and the red portion shows how many trades have been losers so far. The alerts and filters used in the strategy that is being tested appears in the form of icons in the top left part of the window.
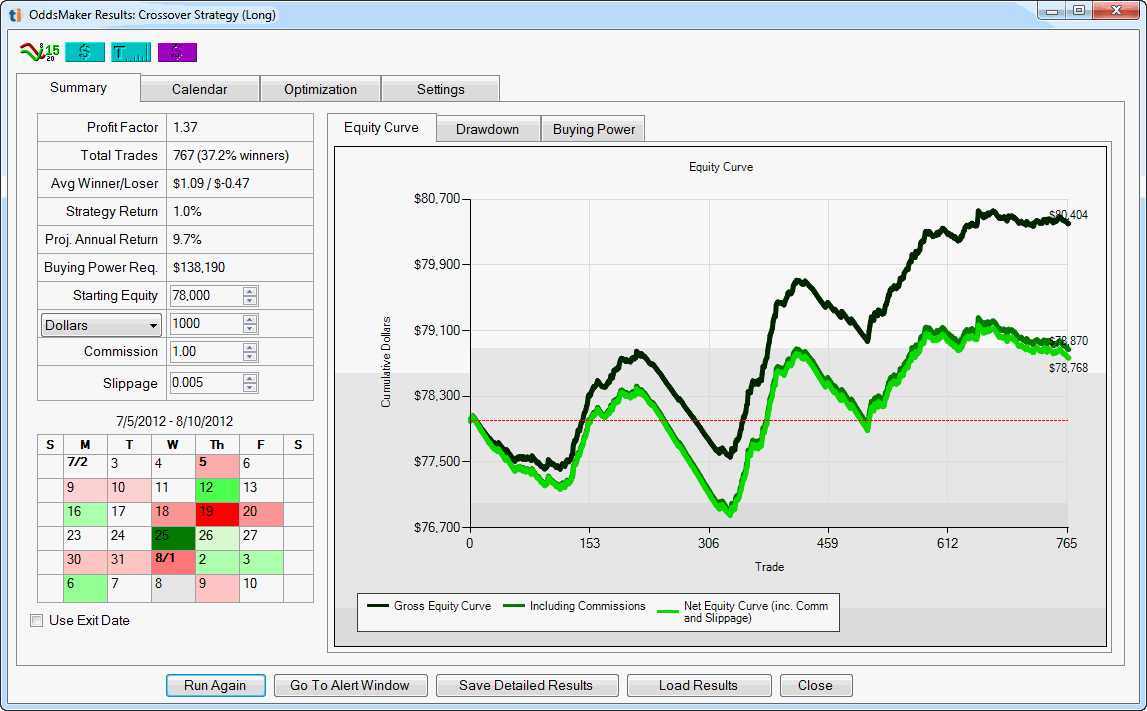
After the completion of the simulation, the results window appears.
The metrics section in the top right shows various performance metrics from the simulation.
| Metric | Definition |
|---|---|
| Profit Factor | sum of profit from winning trades / sum of profit from losing trades (greater than 1 = profit, less than 1 = loss) |
| Total Trades | number of trades taken in the backtest |
| Avg Winner/Loser | average dollar profit per winning trade and losing trade |
| Strategy Return | overall percentage return from the first trade to the last trade in the backtest |
| Proj. Annual Return | this is the strategy return value projected out to an annual basis |
| Buying Power Req. | this is the maximum buying power required during the backtest |
| Starting Equity | account size to begin the backtest simulation with. The amount here affects the strategy return and then projected annual return |
| Dollars/Shares | this field determines position sizing. When dollars is chosen, the value for the field is the amount of dollars to allocate for the position. When shares is chosen, a constant amount of shares is allocated for the position. |
| Commission | per trade commission |
| Slippage | per trade slippage per share. |
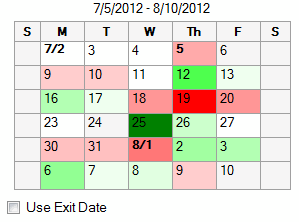
The calendar view on the bottom left hand side of the window gives a daily view of the performance of the strategy. Each day is color coded depending how if trades occurred and how well they performed. A white background appears on the day if there were no trades or if the profit was zero. If the trades that occurred on that day were profitable, the day will appear with a lighter or darker shade of green depending on how profitable the day was. Lighter shades equal smaller profits, darker shades equal larger profits. The same is true for losing days which appear with a red background.
Hover your mouse over a day to see a tooltip that shows more details about the trades for that day including number of winners and losers, total profit, and average gain. The section of the equity curve for that day is highlighted as you hover over the day.
For strategies that are holding at least one night, a checkbox is shown below the calendar called "Use Exit Date". By default, a day will have trades that were entered on that day. Checking this checkbox will redisplay the calendar with each day having trades that were exited on that day.
The equity curve shows the change in your total equity over the simulation period. Most trades are looking for a smooth, upward sloping equity curve. Often times just glancing at the equity curve can identify problem areas that might not be obvious by looking only at the metrics. The curves also make it easy to see the effect that commissions and slippage have on the strategy.
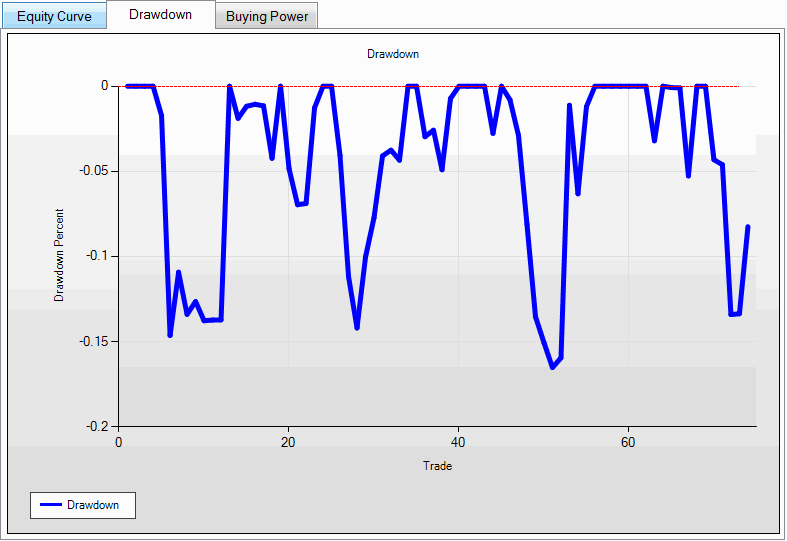
The drawdown graph shows the drawdowns over the simulation period. A drawdown is the peak to trough decline of the equity curve. Large drawdowns are what make traders quit trading. While there is no way to completely eliminate drawdowns, you should understand what drawdowns are likely for a given system and size positions accordingly.
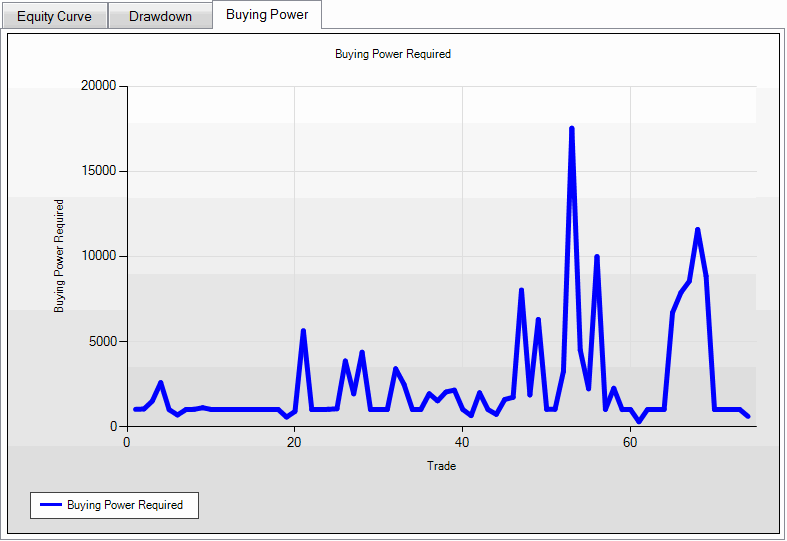
The buying power graph shows the minimum buying power required throughout the simulation period. Strategies that hold many simultaneous positions will require more buying power. This graph can help you determine how much money you'd need to allocate to trade every signal that appears.
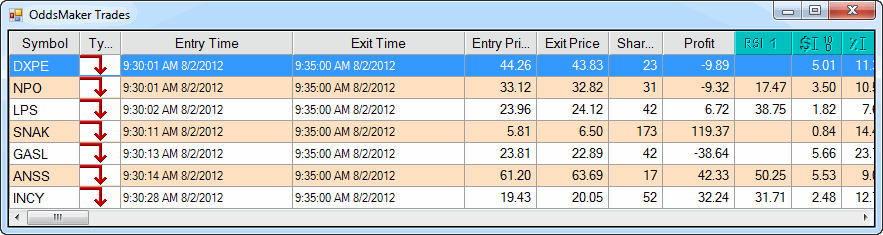
The calendar tab gives a larger view of the small calendar on the Summary Tab with more details. Each day has color coding as the smaller one, but each day where there are trades has the win rate, number of trades, number of winners, total profit, and average gain per trade for that day. Hovering over each day gives a tooltip with the 5 most profitable trades and the 5 least profitable trades. Double click on the day to bring up the trades viewer to view the trades that occured on that day.
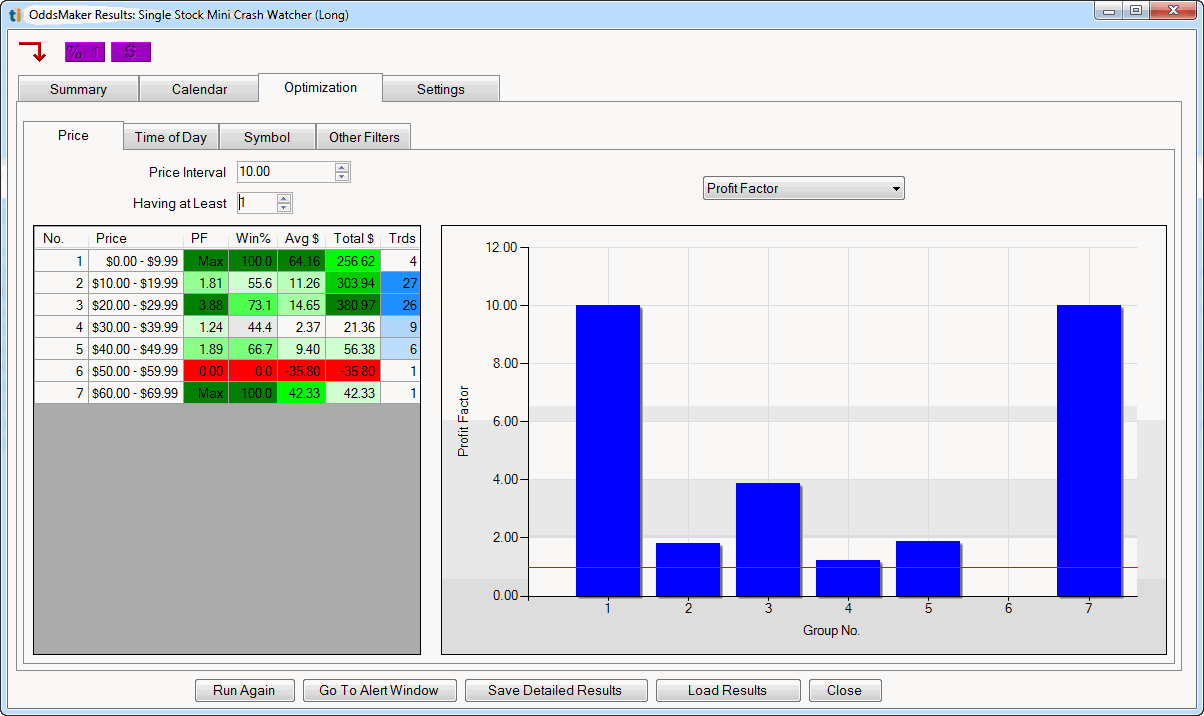
The optimization tab allows you to drill down into the details of the strategy to see what makes it work. Each tab contains a reporting engine that can breakdown your strategy by different filters allowing you to see which subsets of the trades work well and which don't. You can use the information here to add additional filters to your strategy to improve it.
Each report has fields you can use to adjust the view. For example, the price report has a Price Interval field which controls the upper and lower bounds for each bin in the report. The Having At Least field let's you hide bins in the report that contain a small number of trades. Use this field to hide segments that don't have a statistically significant number of trades.
On the right side of the report there is a graph. Most reports default to the Profit Factor graph. You can change the report by using the dropdown to choose a different style of report. Where appropriate, a red line is drawn on the graph to indicate equilibrium. For example on the Profit Factor graph the red line is drawn at 1 because above that level indicates overall profit and below it indicates overall loss.
You can double click on the left grid to display the trades associated with that bucket in the report.
The Other Filters tab will appear if you have displayed additional columns in your strategy or chosen to have additional columns sent to the OddsMaker report. You can choose the filter to report on using the Column dropdown.
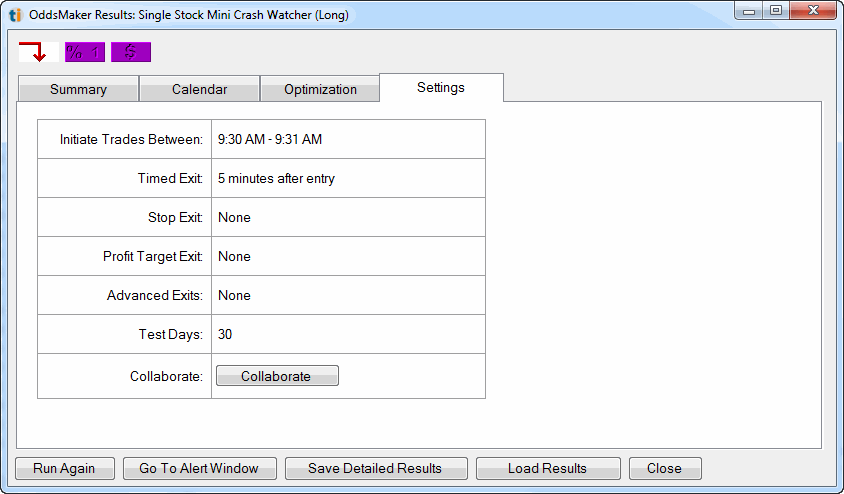
The Settings Tab is a brief summary of the configuration that was used on this OddsMaker run.